Step 2. Setup a Visma Developer Portal
-
Create a Visma Developer Portal Application
In the next steps we will explain how to create and setup your application in Visma Developer Portal.
-
Login to the Visma Developer Portal, using the developer account (not the Brincr user). In here, go to
My Applicationsand click onAdd application. A popup will show up where you will need to select your application type. Our API only allows access fromnon-interactive applications. This means that you can only connect with our API through aservice application, so in our case you have to choose this application type. -
Fill in the Name, Description, Client Id, Privacy policy URI and the Terms of service URI. The Privacy policy URI and Terms of service URI are required later in the Visma Developer Portal store step. Here you can also set the lifetime of your
Access Tokens.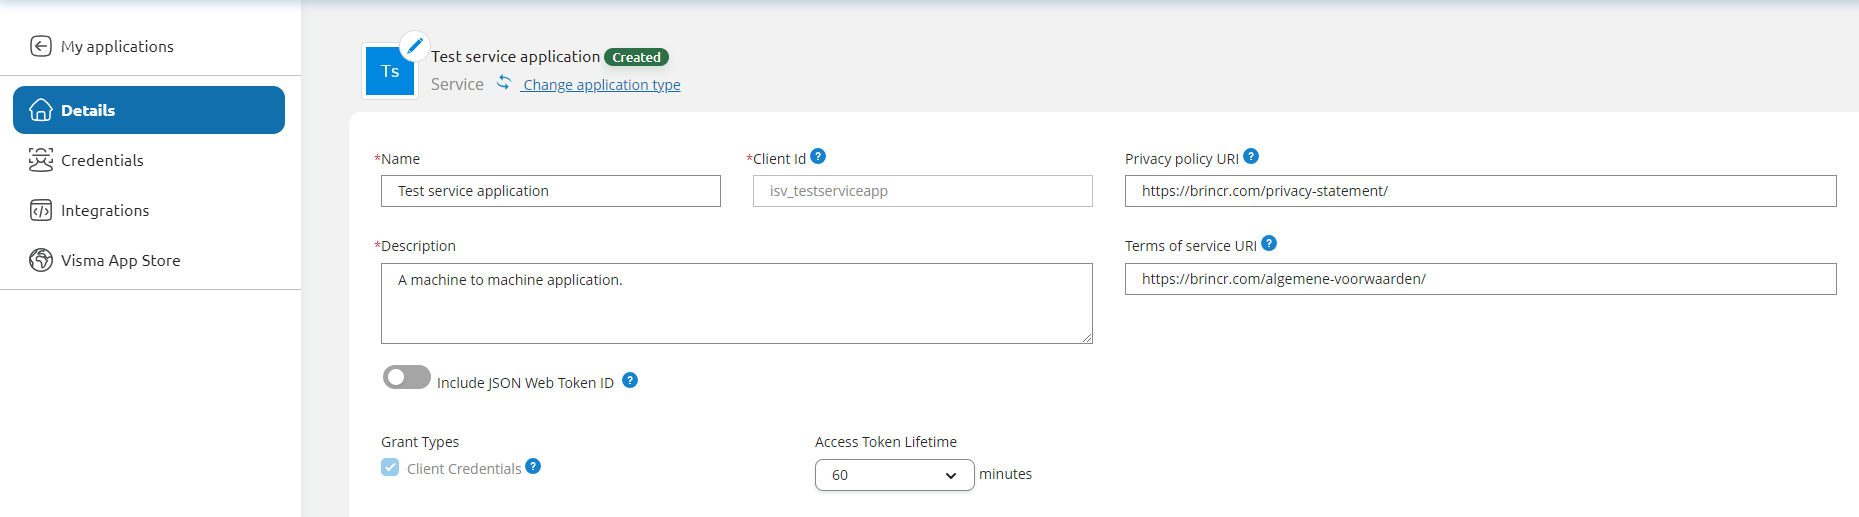
-
After publishing your application, copy the Client Id and login to your Brincr account. Brincr will have automatically generated an API user after completing the setup in Brincr. This API user does not have a Client Id yet. You can press the edit icon to fill in the Client Id from your Visma Application. If you want to connect with multiple applications, you can add a new API user and repeat this step to add multiple applications in Brincr.
-
-
Add credentials
The second step is to add credentials to your application in Visma Developer Portal:
- Click on
Generate secret - Choose an expiration duration
- Make sure to store your credentials somewhere safe
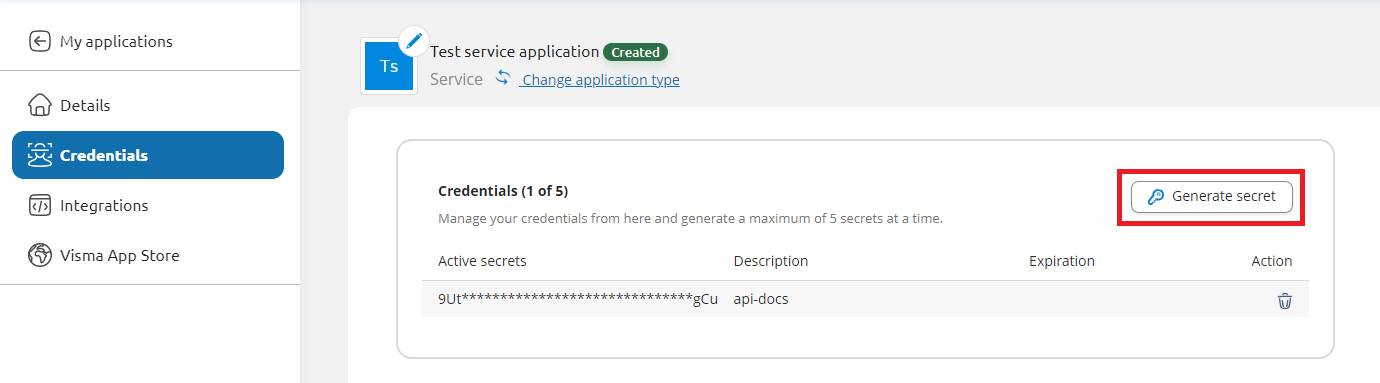
- Click on